
Wednesday, February 23, 2011
Beadaliscious: Eye candy and puctuation
 3:45 PM |
  Posted by
Ellen Anne Eddy |
Posted by
Ellen Anne Eddy |


As addictions go, it started small. I worked in an antique mall for a while where there were several people working in old Czech glass beads. I can ignore most gem beads. I can ignore crystal. But Czech glass can empty my pockets so fast it's like there's a hole. I made my fair share of necklaces and earrings and found myself way too involved quilting to play endlessly with beads.
 But beads sneak in. They're so pretty. They're shiny. They're almost like candy without the calories. They also make fabulous details. When I did the embroidery for Tigrey Leads the Parade, almost all of the flowers in my gardens were great glass beads.
 Where do they come from? I never pass on a bead shop, no matter where I'm traveling, but the bulk of these beads came from an amazing store that's literally down the street from me.
Blue Stem Beads. They're in my little town of Porter, but their collection is mighty and for the size, it's one of the best bead stores I ever saw. Almost all the beads for this book came from there.
These were hand stitched onto tea towels I embroidered. They were fabulous flowers and too much fun. You can see and purchase Tigrey Leads the Parade at my web site www.ellenanneeddy.com
You'll find Blue Stem Beads in Porter,Indiana (just an hour out of Chicago. It's an astonishment.
For the next few posts I'm going to talk about other cool and wonderful ways I've used beads and seen beads used in quilting.
You'll find


 Where do they come from? I never pass on a bead shop, no matter where I'm traveling, but the bulk of these beads came from an amazing store that's literally down the street from me.
Blue Stem Beads. They're in my little town of Porter, but their collection is mighty and for the size, it's one of the best bead stores I ever saw. Almost all the beads for this book came from there.
These were hand stitched onto tea towels I embroidered. They were fabulous flowers and too much fun. You can see and purchase Tigrey Leads the Parade at my web site www.ellenanneeddy.com
You'll find Blue Stem Beads in Porter,Indiana (just an hour out of Chicago. It's an astonishment.
For the next few posts I'm going to talk about other cool and wonderful ways I've used beads and seen beads used in quilting.
You'll find
Blue Stem Beads at 300 Lincoln St # 1X |
Porter, IN 46304-1894
(219) 926-9004
 Labels:

Monday, January 10, 2011
In Praise of Pockets!
 |
| Ellen, Birdy and Ivy |
Golum's riddle to Bilbo the Hobbit
I'm from a story telling family. My mother was Irish. She had many shortfalls, but she could embroider a story until it glowed silver and gold. My father, being of English blood almost never spoke at all.But he read constantly. And when I was a child they both read constantly to me.
One of my mother's favorites was Katie No-Pocket.This child's delight is about a kangaroo who has no pockets and a very tired out baby who she can't always hold when she's traveling. She discovers aprons in her travels and has so many pockets she carries all the other neighbor animals as well.
I think the stories we tell are cement that could fix the world. The stories we tell ourselves can change our fears and our expectations of ourselves and of the world. The stories we tell our children meld theirs. We should always tell stories, but I think we need to understand that they are powerful and wildly unexpected forces. Certainly they teach us how to turn our daily woes into wows.
I know there are somewhere, neat little girls who grow up to be neat adults. I never was one. I made mud pies. I still kind of do. So aprons are a huge part of my life. I don't need an apron to cover my waist or my front. Preferably the 360 degree cover all is what's required. I love aprons for that reason.
But best of all, THEY HAVE POCKETS!
I can lose almost anything. I lose things in front of me as a specialty. So anything I need all day goes into my pocket. My phone, my daily do list, my pen, dog cookies, a rotary cutter, a snack, a book, a flash drive, my camera,the TV remote. But it's all there, somewhere. I have my scissors clipped on at my neck. If it's on my body, it's not lost.
Does that sound like a big pocket? Well, yes. And it does clank.

The only downside to this pattern is that it takes 6 yards of bias. I cut mine from a bias tube (in whatever yummy fabric I want) and put it on with a serger with fusible thread in the lower looper.

You'll find instructions for no-hand-stitch bias on a serger in my booklet, Machine Binding Techniques.
You'll find my favorite apron pattern here or at your local pattern store. My Favorite Apron Pattern
You'll find other apron patterns here.
Search Amazon.com for apron patterns for women

You'll also find Katy No-Pocket (Sandpiper)
 at Amazon.com. Read it for yourself or share it with your babes. It's a story that changes worlds.
Get ready to get messy and not lose anything. How good is that? The book should fit in your pocket.
Wednesday, September 22, 2010
Bobbin Work: On the Loose-Dealing with Distortion

As you've seen, the possibilities are endless entertainment. Bobbin work is easy, fast and fun.
I hope you got out your machine, played around, looked through your thread box and started to explore this great new world.
But there is a dark side. Any time you've put that much thread through a fabric surface you can be looking at some serious distortion. It depends largely on how much you fill in. If you're just outlining things or stippling, it's probably not a problem. If, like myself, you got a bit crazed and did a four foot cricket, it's probably ruffling up like a child's party dress.
I don't believe in giving recipes for cakes that don't rise. I might forget to tell someone an important ingredient but I'd never deliberately leave it out. I hate games where you can't win, and I won't ever do it to a student, a friend, a stranger or stone cold adversary.
So here's the extra ingredient. If we're working on a dense piece of embroidery, we can always cure it by cutting.
Any larger image (over 3 square inches) I'll do on a separate sandwich of felt, fabric, and stabilizer and treat it like an appliqué. When I'm done, I cut right on the edge ( don't cut through the stitching) and zigzag free motion around the edges with black thread to make it all pop. We cut of the distortion and life is so much better. What problem?
You'll find the information for preparing your felt and fabric sandwich on a previous blog Fabulous Felt: Unthinking Interfacing.

Your sandwich, top to bottom is
Surface fabric
Steam-A-Seam 2
Polyester felt
Totally Stable
Steam iron it well so that your Steam-A-Seam 2 is melted, sticking things in place and won't gum your needle.
My hoop is Sharon Shamber's Halo Hoop.You'll find more information on it in a previous post Hoop-Dee Do.
Wrapping it up:
Really dense bobbin work may ruffle and distort your surface. Do it on a separate stabilizer sandwich and cut the appliqué out. Use the free motion zigzag stitch to apply it to your quilt.
Thursday, August 12, 2010
The Trees Speak!

Are books dead?
My first impulse is to grab every child I see on the street, bake a big batch of cookies, sit them on my porch and read to them. Reading is the window to the world. Can you tell I came out to teach primary? Well, yes.
It's actually deeper than that. My mother taught school and was president of the library board. Both she and my father read to me nightly. Of course she read me The Little Gray Squirrel. My father read me whatever he was reading. It ranged from the Jungle Book, to Argosy Magazine to Gods Graves and Scholars. I was around three at the time. I can't say I understood it all, but it cemented my love for books. I can't imagine a world without them. I can't go to sleep without one either. The smell of ink, the touch of paper, glossy and full of color and impact, still is electric for me. The stories are often my only company for days.
Technology often scares me. I went through a phase where I refused to learn how to use my voice mail. It was childish, but I felt overwhelmed. My ten year old neighbor is teaching me how to text. I'm not a quick study.
So when you tell me books are dead, my panic starts to rise like sap up a tree. I have images of all of us rushing into book stores and saving the books!
But books are not just paper and binding. Really what a book consists of is a story told, an event explained, a technique discovered, a life explored. Books are information! Information is always holy and always needs to be preserved.
Having written several books, in the current age, I can tell you that they are completely set up digitally now. When I finish a book and it goes to the printer, it goes simply as a PDF file, electronically sent and received. The printed form is simply one of many ways it can be distributed.
Technology changes. As daunting as I find technology, I no longer rush to my herbal books when the dogs are hurt. I go on the internet. The search for information is eternal. The formats will change in time and space. I have an image of monks rushing a printing press saying that it couldn't possibly produce the kind of books they had over the years. They would have been right. The printing press a huge open door they could have never reached with a pen in their hands.
Lately I've discovered Audible.com. You can download books to an mp3 player and listen. I'm in love. It's as if my father is back reading to me. My player holds around 20 books at a time. And my mp3 player fits in my bra. How many books can you carry in yours?
Wrapping it up:
The technology changes, but the need for information is eternal. Books will go on and speak for ever.They may just not be made of paper any more. And since digital storage isn't anything like a library full of books, they may well be much more available for longer periods of time and in ways we can't imagine.
You'll find MP3 books at Audible.com
You'll find more of my books at Amazon or on my web page at
Monday, July 12, 2010
Color Theory for Thread: Basic Shading for Embroidered Appliqué

Now, don't be silly. We know the answer to the age old question, "How many mushrooms do you put in a quiche?" The answer, of course, is" How many mushrooms do you have?"
But it's not exactly that reason. You don't pull in a million colors because you could. You do because it's how nature is. It's all about variance.

.jpg)
To weight the embroidery, I'll add a shader at the bottom of each area. A shader can be a darker complement to the color or dark blue, grey, brown, green or purple.
To lift the color and make it more exciting, we'll add a shocker right before the last color. It can be a bright complement to the basic color or orange, lime, hot pink, or bright purple.

Wrapping it up:

- Pick a wide range of colors from dark to light for each zone. Go way lighter than you intend for highlights and way darker than you might to weight the piece.
- Pick a complement or very dark color to shade your piece.
- Pick a complement or very bright color to shock your shades.
- End with the color you want to see the most. You will.
Monday, June 28, 2010
Basting: It's Not Just for Turkeys

 Several weeks ago, I went looking to order another basting gun. They don't last forever. Even with new needles, there's a day when the pin bends. I was appalled to be told my supplier wasn't carrying them anymore.
 These are a love/hate item for a lot of quilters. Do they leave holes? Yep. They can. Do they jam? Yep, they do.Why am I insistent on having one? Because they're still the most hand-friendly way to baste out there.

In comes my tack gun.I can tack things up, look them over, clip out whatever doesn't work. Problems and all, I'm still in love.

The Quilt Basting Gun
 is a good design tacker. It's perfect for basting large elements to your quilt.
  You might want to consider the Micro stitch
 for basting quilts. The tacks are smaller and leave smaller holes. I usually steam a quilt and the holes all pull together.
Either way, I feel the baby is in danger of going out with the bath water here. They're not a perfect tool, but I can't imagine being without.
Tuesday, May 11, 2010
Fabulous Felt:Unthinking Interfacing

The main room was the ordinary sewers room. It had domestic cottons, polys, wools and test tube baby fabrics like satins and lace. It also had the craft fabric, with a huge wall of felt.
Felt has gone through a lot of reincarnations. In the 1980's I would have given it the most useless fabric award with bells and ribbons on it.
The original felt of felt skirts and jackets was pure wool. It was a delicious fabric to work with. It was strong, bright and beautiful. By the 80's it also cost the earth. So it was replaced with a hybrid of wool and rayon. This nightmare fabric had curly wool fibers mixed in with straight tree bark fibers (Rayon is made from tree bark.) What a tactical error. Instead of being strong and vibrant, it was always pulling apart( curly and straight fibers don't make a good combination.) At some point I completely wrote it off as a fabric I would ever use again. It didn't even paste together well.
When the first poly felt came out it too was thin and nasty. So I've ignored felt for neigh on 15 years.
So I was completely surprised when Lauren Strach (a fabulous quilter out of St. Joseph, MI) came in with some embroidered flowers where she'd used the new poly felt as a stabilizer.
So the sandwich, top to bottom is
Surface fabric
Steam-A-Seam 2
Felt
Totally Stable

You can use wool felt as well. It's pricey and the poly works just as well.
The other thing that makes this work is Sharon Schamber's Halo hoop. This weighted hoop supplies extra support without having to be clamped or unclamped. See my blog Hoop de doo for more information about this fabulous tool.
Wrapping it up:
Poly felt makes a fabulous stabilizer for embroidery. And keep your mind open. Fabrics change all the time. There's no knowing when you'll a new use for something old.
Subscribe to:
Posts (Atom)
Essential Embroidery Stitches

Get this free book from Quilting Arts. It has a series of articles I wrote called Defining the Line
My Blog List
-
Moving Day14 years ago
-
Getting Together14 years ago
-
Getting Together14 years ago


Facebook Badge

My Blog List
-
IDEA1 day ago
-
Like a Rolling Stone3 months ago
-
Embroidered Felt Bowl #4.5 months ago
-
-
2021 Calendar5 years ago
-
A Change is Coming….6 years ago
-
GOrillas! on the Move!6 years ago
-
finish line in sight7 years ago
-
Easton Walled Garden7 years ago
-
-
Winsor Newton Pigment Marker Review9 years ago
-
gelliprint met gedicht9 years ago
-
Casey's T-shirt Quilt9 years ago
-
-
The San Salvador Sails By ...10 years ago
-
-
Construction Zone 10111 years ago
-
What a summer....so far12 years ago
-
Revealing BSBP 8....12 years ago
-
So this is Week 7?12 years ago
-
The last cloth doll making cruise13 years ago
-
-
Fall journey13 years ago
-
I've Moved...My blog That Is!13 years ago
-
This Blog has Moved....14 years ago
-
QUILTVERSE HAS BEEN REVIEWED!14 years ago
-
-
-


Guest Blog On Quilt Gallery
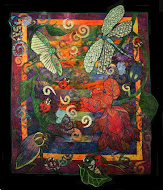
A Beauty Beheld
Guest Blog On Subversive Stitchers!
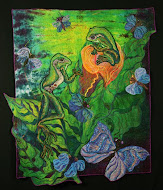
The Stories Tell Me
Networked Blogs

